Java agent installation
Follow the steps to install Java agent:
1. Click “New Application” in the upper right corner of the overview page:

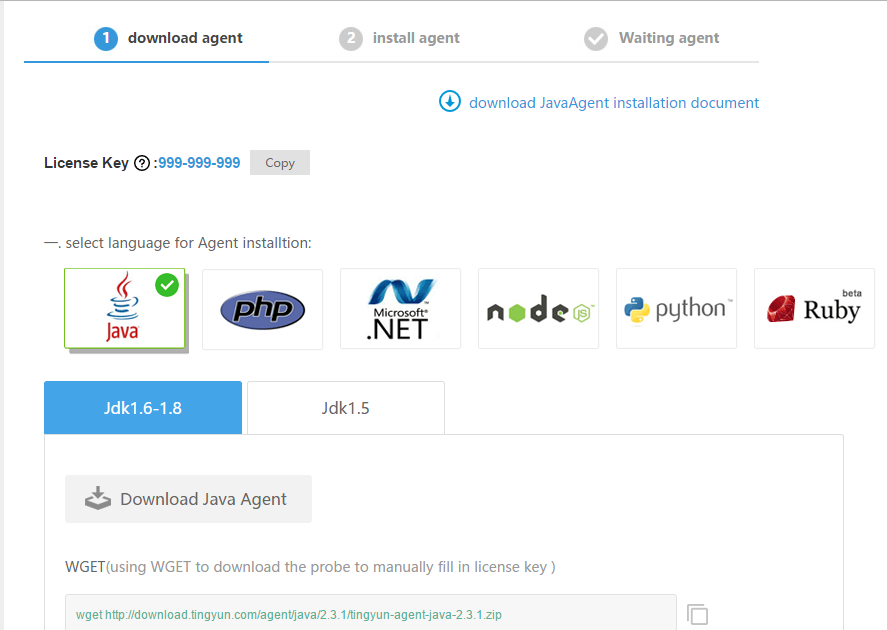
2. Download the appropriate agent and click “Next”:
3.According to the tutorial, you can choose to install manually or automatically
1) Automatic installation (support for JBoss, GlassFish, Jetty and Tomcat)
Choose your system environment, Windows, Linux or Mac.
a. Windows:
Opentingyun-agent-java.zip
Copy the tingyun directory to the root directory of your application server
Execute the following two commands in the command line window:
cd tingyunjava -jar tingyun-agent-java.jar installb. Linux or Mac
Unzip the installation package into the root directory of your application server:
unzip tingyun-agent-java-lastest.zip -d /path/to/appserver/Execute the automatic installer in the tingyun directory:
cd /path/to/appserver/tingyunjava -jar tingyun-agent-java.jar install2)Manual installation
Unzip the installation package into your application server’s root directory (recommended) or specify the directory backup tingyun directory tingyun.properties file </ br>
Added in the application server’s startup script:
-javaagent:/path/to/tingyun/tingyun-agent-java.jar4. After the installation is complete, wait 5 minutes. When you hear the data from Tingyun server system, your application will be displayed in the list of applications in the overview.
5. If you do not see any application performance data in a matter of minutes, maybe your installation is problematic and you can get help in the following ways:
1)Manually install and execute deployment scripts and download to read “Java agent installation documentation”
2)Technical Supportsupport@networkbench.com
Manually configure the custom installation in xml file:
1. Overview
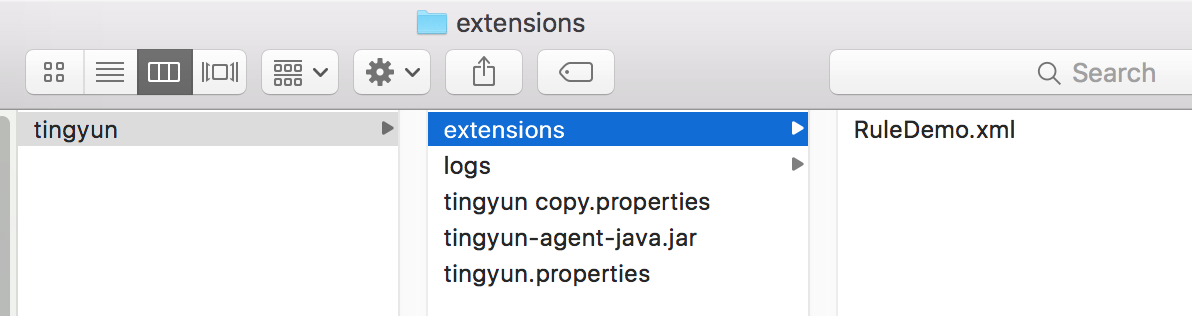
Java agent supports custom monitoring in the form of xml files. Each xml file is the basic unit for Java agents to read custom configurations.If you want the configured xml file to take effect, you need to put it in the extensions folder under the Java agent root directory. The directory allows multiple configuration files to be placed at the same time, and the configuration in each file will be read. If the method of a class is set repeatedly, the configuration for the first read will takes effect. It is not advisable to set the rules repeatedly. For 2016 versions of the agent are already created this directory. If the directory does not exist or do not delete, you can create it manually. The directory structure is as follows:
2. Xml file structure and elements
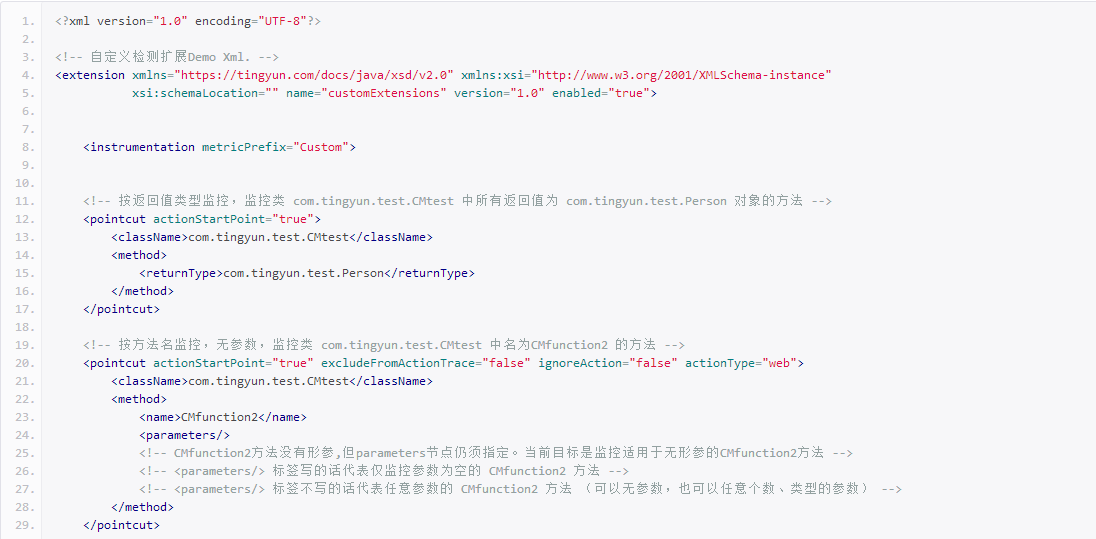
The basic structure of the custom monitoring document is as follows:
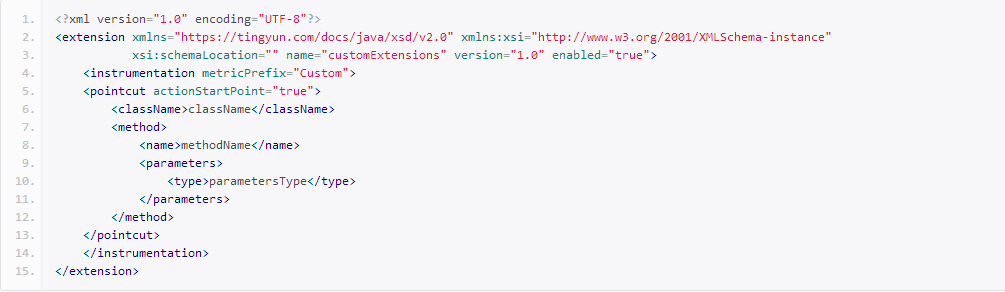
The custom monitoring document elements are as follows:
instrumentation: Configuration set, custom monitoring read the basic elements of the configuration, the following can have multiple configuration points.
pointcut: Configuration point, used to configure a class or interface, the following can be className element, interfaceName element, method element.
className/interfaceName:Configure the class name or interface name of the target, the value should be the package name + file name
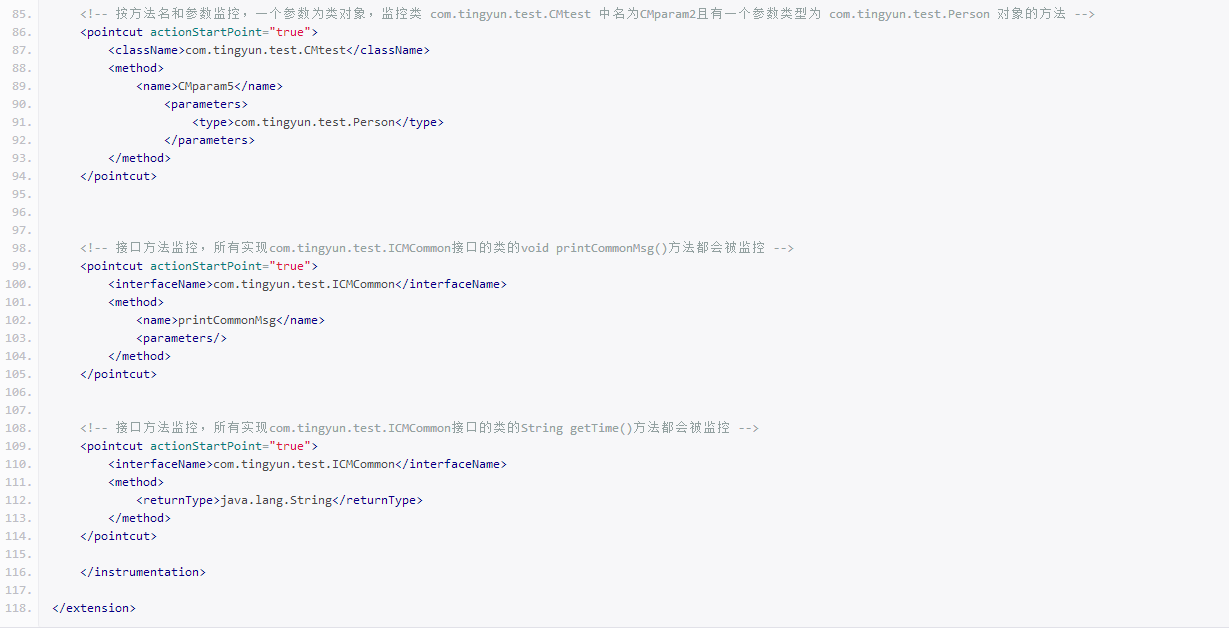
method:The monitoring target method can be configured according to the return value type, the configuration parameter type, and the no-parameter method. The following can be parameters, / parameters and returnType.
parameters: Monitor the formal parameters of the target method,you can configure 0 ~ multiple parameters, each parameter is configured under the type tag.
returnType:The return value of the monitoring target method can only be configured one. The return value is the underlying data type, or the class object.
Note: The basic data types are byte, short, int, long, float, double, boolen, char, other data types need to write all-inclusive complete class name, such as com.tingyun.test.Person, java.lang.String.
3. Configuration instance
Below the configuration instance, the custom monitoring configuration in the console report-side is transferred to the configuration method for Xml,the effect is equivalent. As the configuration of the object is also a demo application, which involves the interface, entity class, business class source, you can refer to the console use for [custom embed code] (http://help.tingyun.com:81/server/html/ Zidingyifangfajiankong.html), here is no longer introduced.


Xml configuration advanced:
In the Xml configuration instance above, you may see that there are configuration options on the pointcut, instrumentation tag, such as actionStartPoint, metricPrefix. The following is a brief introduction to the use of these options.
metricPrefix:The methods configured in the current configuration file will be categorized into the class specified by metricPrefix. The scenario is used to classify a series of methods of the current xml configuration as A business, and the method of configuring another xml file as B business. So that at the report-side, you can see the performance of the method that has been classified business.
The default is metricPrefix = Custom.
actionStartPoint:Used to annotate a method for a separate action (backgroundaction or web action), some open source components or frameworks that can not be well supported by Java agents, some methods may be able to represent a business request, but these requests can not find father Action. When configuring actionStartPoint = true, the current method can be marked as an action.
excludeFromActionTrace: When configured as true, the actiontrace will not contain the currently configured custom monitoring method, and the performance data associated with this method will not be seen on the tracing details page of the report. Default excludeFromActionTrace = false.
ignoreAction: When configured as true, the current Web action performance data will not be collected and the web action that invoked method can not be seen in web application process on report-side. Default ignoreAction = false.
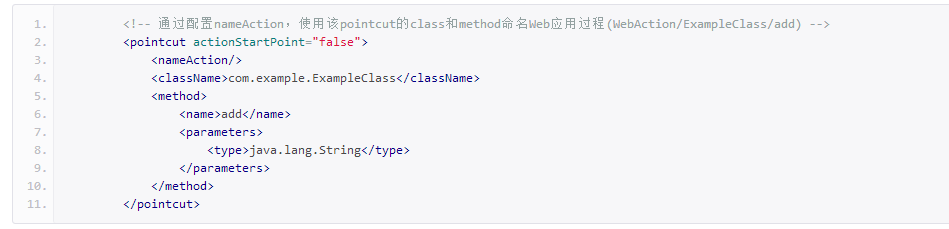
<NameAction />: <nameAction /> tag You can use the current method ’WebAction + className + methodName `as the name of the web action. Examples are as follows: