Tingyun Android SDK installation
1. Set application name
Please set an easy-to-identify app name for the App that needs to be monitored. The App name will show on the App list and the associated report to represent the corresponding App.
App names can use alphabet, number and Chinese and up to 32 characters length. Set the App name, try not to set a repeat App name, so as not to cause unnecessary trouble.
Your App name can be edited at any time in the setup options
2. Use Maven to build
(1)Merge the following configuration into your pom.xml file:<dependencies><dependency><groupId>com.networkbench.newlens.agent.android</groupId><artifactId>nbs.newlens.agent</artifactId><version>TingYun_Version</version></dependency></dependencies><build><plugins><plugin><groupId>com.networkbench.newlens.agent.android</groupId><artifactId>agent-maven-plugin</artifactId><version> TingYun_Version </version><executions><execution><goals><goal>instrument</goal></goals></execution></executions></plugin></build>
Note: TingYun_Version is the current Tingyun App version number, you can visit the official website for the latest version: http://www.tingyun.com/. Such as: 2.3.0.
(2)Set the application authority
Add the following permissions to the AndroidMainfest.xml file of the App project to be monitored:
<uses-permission android:name="android.permission.ACCESS_NETWORK_STATE" /><uses-permission android:name="android.permission.ACCESS_WIFI_STATE" /><uses-permission android:name="android.permission.READ_PHONE_STATE"/><uses-permission android:name="android.permission.READ_LOGS" /><uses-permission android:name="android.permission.INTERNET" />
(3)Insert the code that starts NBSAgent
Import Tingyun Android agent class in the main Activity source file for the app you want to monitor:import com.networkbench.agent.impl.NBSAppAgent;
In the onCreate () method (if not, add the onCreate () method) add the following call that initializes Tingyun App agent:
NBSAppAgent.setLicenseKey("AppKey ").withLocationServiceEnabled(true).start(this.getApplicationContext());
Note: If the project uses the Tencent X5 framework, please call the setX5Enable () methodNBSAppAgent.setLicenseKey("AppKey ").withLocationServiceEnabled(true).setX5Enable(true).start(getApplicationContext());
If you do not need to collect region information (the data in the report will not have a regional dimension) , please use the following code:NBSAppAgent.setLicenseKey("AppKey ").start(this.getApplicationContext());
“AppKey” is generated from Tingyun App system.
(4)Set the obfuscator
If you use the ProGuard tool to optimize the released apk package for the App to be monitored, in order to ensure that Tingyun App SDK can be used normally, please add the following in the project’s proguard.cfg file:
# ProGuard configurations for NetworkBench Lens-keep class com.networkbench.** { *; }-dontwarn com.networkbench.**-keepattributes Exceptions, Signature, InnerClasses# End NetworkBench Lens
If you wish to keep line number information, we recommend adding the following code to proguard.cfg:-keepattributes SourceFile,LineNumberTable
(5)clean project
It is recommended to clean project projects under Terminal to ensure that Tingyun App settings is in effectmvn clean
(6)Run apk
After compiling, run the App to be monitored on the emulator or Android device and make some appropriate network access.
3. Installation Verification
Run the SDK after the installation is complete, connect the computer, use LogCat to filter TAG = NBSAgent to view the log
The following log appears means that the installation is successful: NBSAgent startNBSAgent enabledNBSAgent V “TingYun_Version”connect success
4. Performance data collection
If the above steps are correct, Tingyun App Android SDK agent has been successfully deployed to the App. Keep the App running and access the network, wait a few minutes to view performance data of the App in Tingyun report.
5. Crash anti-confusion
In order to better help users resolve crash information, we provide an anti-confusion mechanism to help users quickly and accurately identify the crash location. When you use the anti-confusion mechanism, you need to upload the current version of the Mapping File to Tingyun server.
At present, we provide two ways to upload Mapping File, you can choose any way to upload your Mapping File. This process will not interfere with code and package compilation for normal users .
5.1.Find the Mapping File
Enter the embedded project root directory, search Mapping.txt。
5.1.1. The report uploads the corresponding version of the Mapping File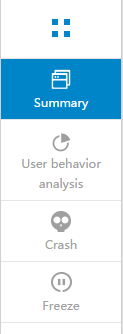
i.Login to Tingyun report, select the corresponding app name in the App Overview, enter the App menu and select the the left “crash” button: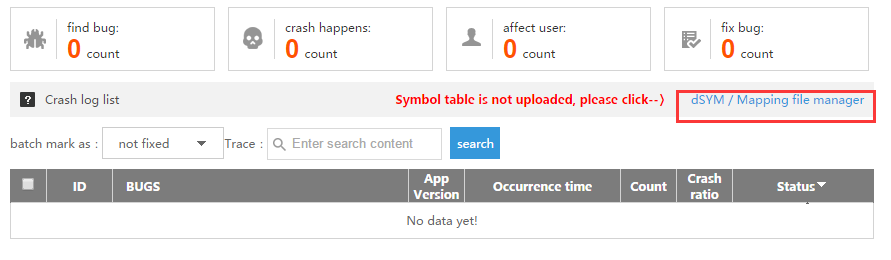
ii.In the right side of the “crash history record list” select and click “dSYM / Mapping file management”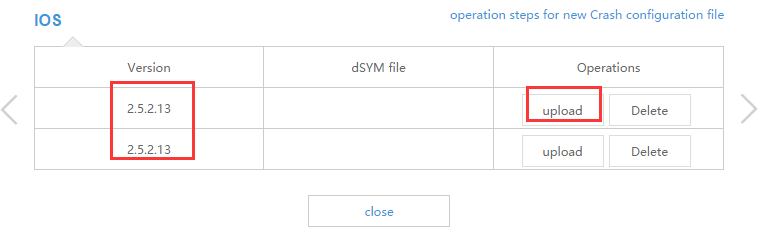
iii.In the pop-up window, select the upload platform type, such as “Android”. Select the corresponding application version number, and click the right upload button, manually upload Mapping File
6. Configure tingyun.properties file
6.1. Create a new configuration file
Go to the Eclipse installation directory and create a new tingyun.properties configuration file in the Eclipse.ini sibling directory
6.2. Configure Mapping File automatically upload
Add the following configuration items to the tingyun.properties configuration file:authKey=Tingyun API Account Authorization KeyappKey=Tingyun App Authorization Keymapping_file_auto_upload=Upload Mapping Switch
1)Configure AuthKey authorization key
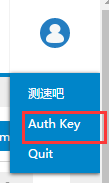
i.Login report, select the user name, click to modify the authorization key
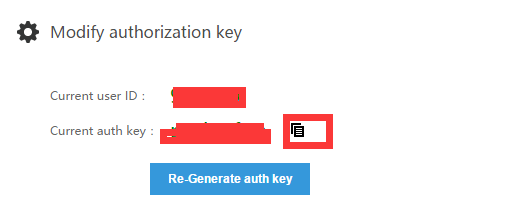
ii.Copy the "current authorization key” and paste it into the configuration file
2)Configure AppKey

i.Login to report, in the App overview, select the corresponding App name, such as: Android_SDK. Click the left side of the configuration button, select “modify settings”
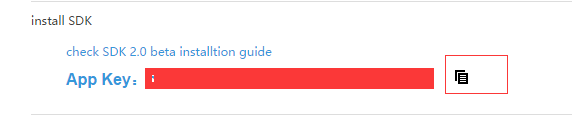
ii.Into the “modify configuration”, find “install SDK” select “App Key” and copy it to the configuration file
2)Configure the mapping_file_auto_upload upload switch
If you need to automatically upload Mapping File, please open the Mapping File control switch in the configuration file:mapping_file_auto_upload=true
Note: Changing switch will only take effect when the anti-confusion is enabled. To upload the Mapping File to Tingyun server through the host, you can open the Mapping File upload switch when it is released or needed. If the application does not open the anti-confusion, the SDK will not be enabled Configuration file
6.3. Configure OkHttp control switch
Add the following configuration items to the tingyun.properties configuration file:okhttp3.0=true
Note: Tingyun default embeds code to OkHttp2.0. If you use Okhttp2.0 please ignore the settings, if the use of OkHttp1.0, please set okhttp2.0 = false
6.4. Configure WebView control switch
Add the following configuration items to the tingyun.properties configuration file:webview=true
Note: Tingyun WebView needs to use setWebViewClient method, if not implemented the method, please add the following codewebview.setWebViewClient(new WebViewClient() {});
7. Configure user-defined additional information
Tingyun App provides a user-defined additional information interface, the user can customize configure additional information. When the application generates Crash, it is uploaded to the report server. The user can configure the interface at any location after reinitialization. UserCrashMessage can add up to 10 additional information, each additional information up to 100 bytes.
The user-defined additional interfaces are as follows:NBSAppAgent.setUserCrashMessage(String key,String value)
Appendices
Tingyun App supports protocol class library
HttpURLConnection
AndroidHttpClient 4.0
Apache HttpClient ( > 4.0)
Volley+OkHttpClient
OkHttp 2.0 ( > 2.1)
OkHttp 1.0
Retrofit (> 1.9)
Tingyun TCP support device version
Currently only supports Android 4.0